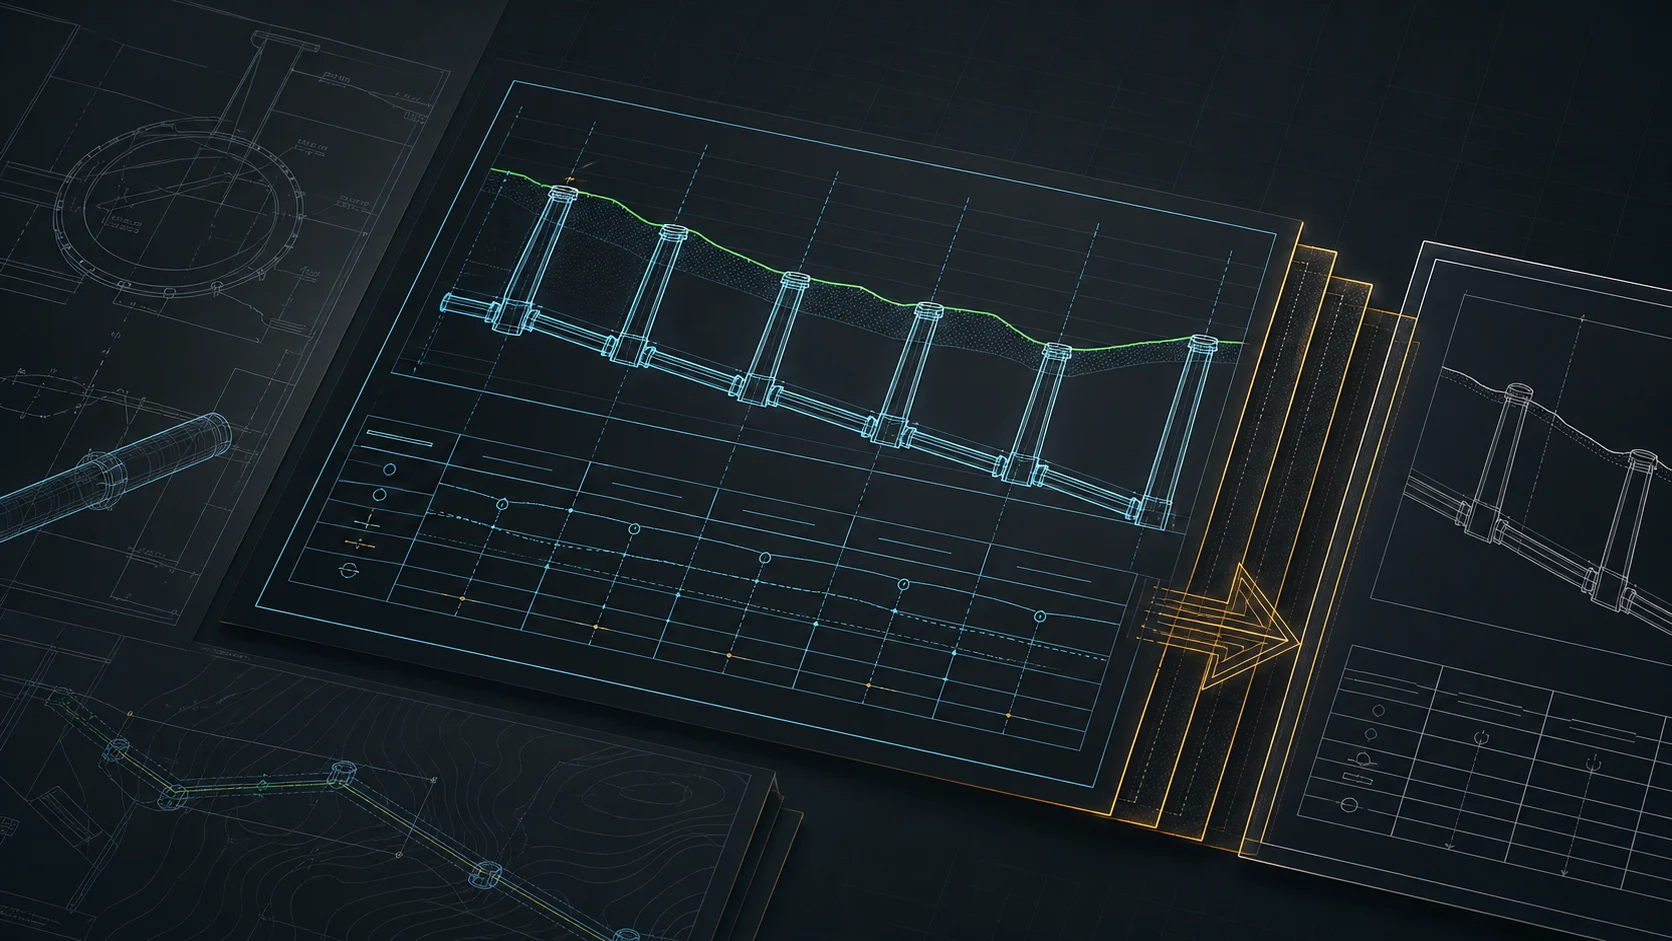
District heating long section — preinsulated pipe in profile
Quick answer
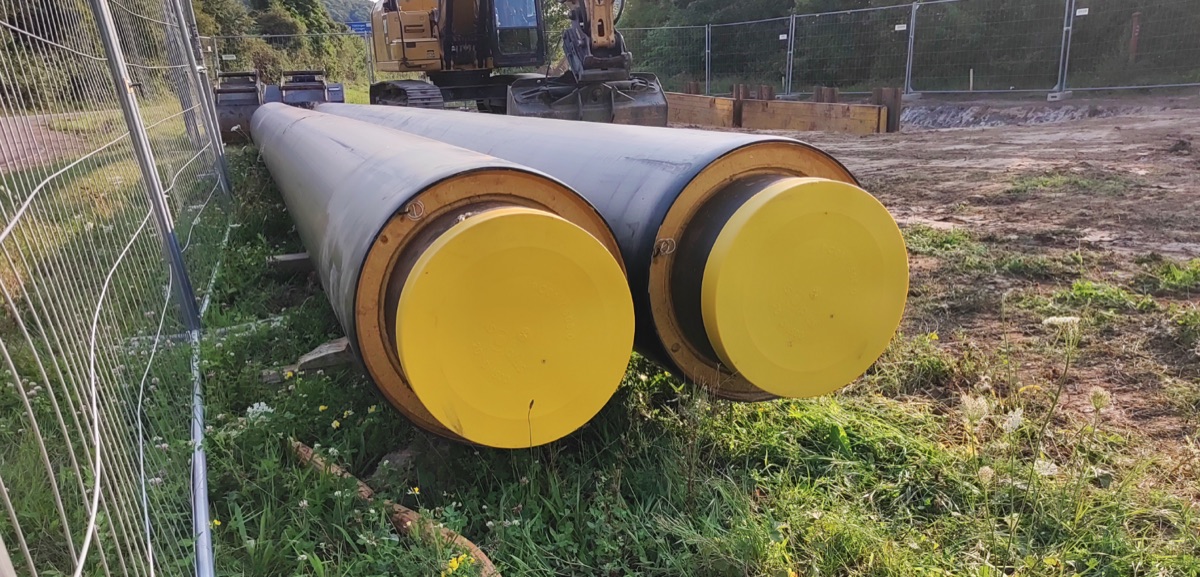
A district heating long section differs from water or sewer profiles because the buried element is a preinsulated bonded pipe: a steel carrier, PUR insulation and an HDPE casing. Cover is measured to the casing crown, not the carrier, typically 0.6–0.8 m per the structural check to EN 13941. The profile also documents carrier and casing diameters, leak detection (impulse or resistance), and crossings.
A district heating long section follows different rules from a water or sewer one. What goes in the ground is a preinsulated bonded pipe — a steel carrier pipe, PUR foam insulation and an HDPE outer casing in one. That puts three things into the profile that a bare pipe doesn't have: two diameters (carrier and casing), the cover measured to the casing crown, and leak detection as a documented system. Below is the path from coordinates to a deliverable DXF — designed to EN 13941 (and, in the UK, the Heat Networks: Code of Practice, CP1).
What makes a district heating profile different
- Two diameters. What governs the position in the ground is not the carrier pipe but the HDPE casing — cover is measured to the casing crown, not the carrier crown. The preinsulated pipe is carried in the profile with both the carrier and the casing diameter.
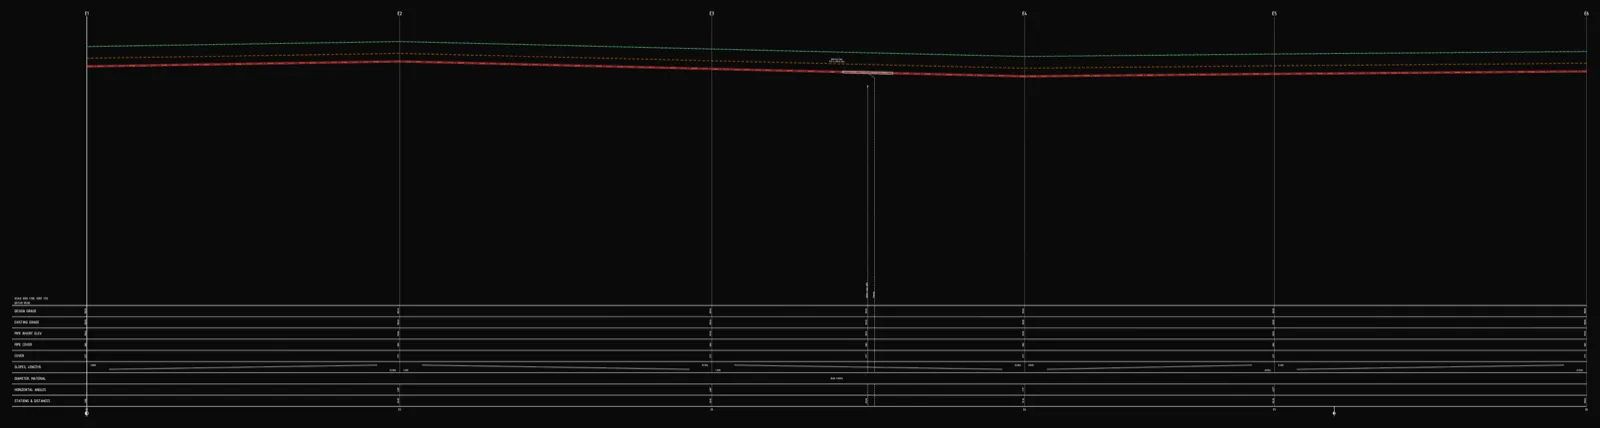
- Thermal expansion. The system is laid bonded (fully restrained); the axial expansion at changes of direction is taken up by expansion cushions, and where needed by anchors and expansion joints. Those points belong on the plan and in the profile.
- Leak detection. Monitoring wires run inside the casing — as a pulse/impulse (Nordic) or resistance (Brandes) system. It is documented in the long section so the whole route is monitored.
- Twin-pipe. District heating is usually two-pipe (flow and return); in the profile you normally carry the flow pipe, with the return running in parallel.
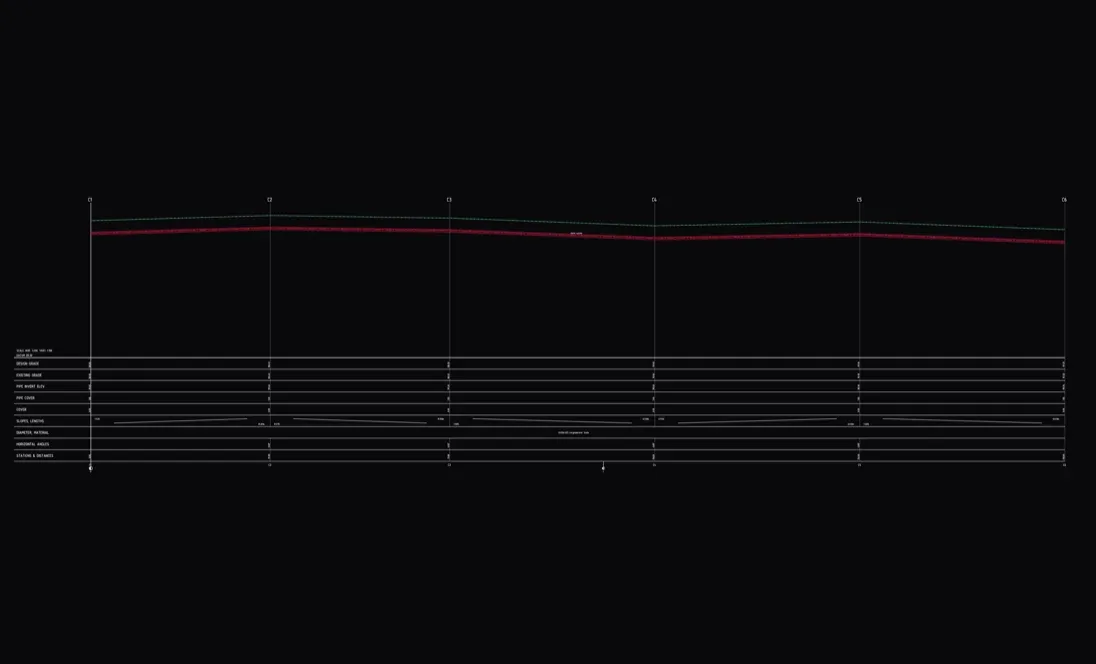
What the long section must contain
A checklist for sign-off (network operator, EN 13941 / CP1):
- the route with chainage and existing and proposed ground levels,
- the pipe axis and the minimum cover to the casing crown, checked along the full length,
- the carrier and casing diameters per section and the material (preinsulated steel),
- expansion cushions, anchors and expansion joints at the governing points,
- the leak-detection system (impulse or resistance),
- crossings with other utilities at the collision level, plus sleeves and inverted siphons,
- the connection point / energy transfer station at the end of the route.
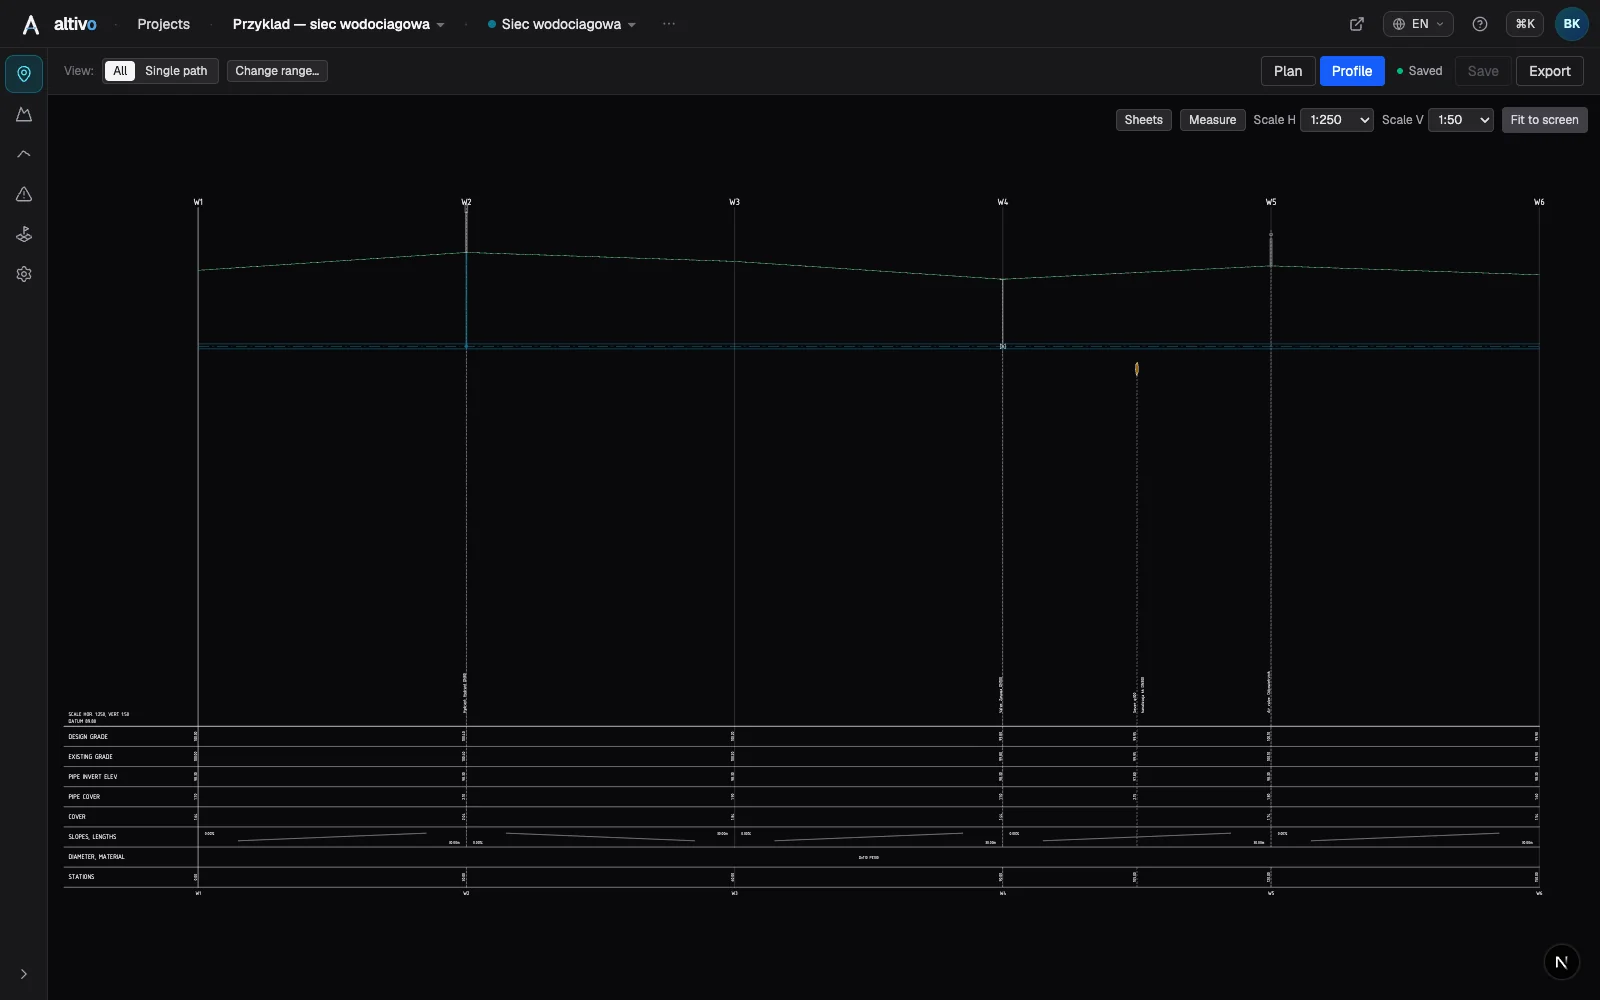
Step by step in Altivo
1. Points with chainage. Paste the node coordinates straight from a spreadsheet or a CAD table and set the network kind to District heating. The profile is then computed against the pipe axis and the material defaults to preinsulated steel.
2. Heating settings. In the network settings you set the Default jacket Ø (mm) and the Leak-detection system — None, Impulse (Nordic) or Resistance (Brandes). The profile then knows the casing diameter alongside the carrier and carries the monitoring with it.
3. Ground levels and cover. Fill in the ground levels at the nodes and set the depth so the cover to the casing crown stays above the minimum — typically around 0.6–0.8 m, with the governing value coming from the structural check under the relevant traffic load. Cover is checked along the whole route, so you see at once where the casing runs too shallow. More on the elevation in the profile.
4. Objects and crossings. From the object library you place valves and the connection point. Mark collisions with other utilities as crossings — Altivo computes the collision depth and draws it on the profile. Add a protective sleeve under roads.
5. Profile table, DXF and IFC. Configure the rows the reviewer expects (ground level, pipe axis, cover, chainage, diameter). The DXF export produces a dual-scale file with clean named layers and editable MText. To take the network into BIM coordination, export a georeferenced IFC model as well.
Frequently asked questions
Where is cover measured to? For preinsulated pipe, to the casing crown, not the carrier pipe. With the District heating network kind, Altivo measures cover to the casing automatically.
What is the typical cover? Around 0.6–0.8 m as a guide; the governing value comes from the structural check to EN 13941 under the traffic load. Unlike potable water, frost depth isn't the driving figure — the pipe carries a warm medium.
One or two pipes in the profile? Usually you carry the flow pipe; the return runs in parallel with similar values. The pressure-drop calculation in Altivo refers to the flow pipe.
How is leak detection shown? As a property of the network (impulse or resistance), so it is documented that the whole route is monitored.
What you get
A district heating long section with two diameters, cover to the casing and leak detection — fiddly to assemble by hand in CAD and a spreadsheet — comes down here to a few nodes and minutes. No install, in the browser; the result plugs into your CAD workflow as DXF and into BIM coordination as IFC.
See also: How to add crossings and objects, How to read a utility long section, What is IFC — exporting utility networks to BIM.
Try it free — 14 days, no card required.
Related articles
Underground cable long section — power and telecom cable routes
How to draw the longitudinal profile of a buried power or telecom cable route: minimum burial depth by voltage class, crossings, protective ducting, warning tape and a DXF export — in the browser, no CAD.
Water main long section to DXF — step by step
How to draw a water main longitudinal profile: minimum cover vs frost depth, pipe centreline levels, valves and hydrants, crossings, the profile table and a clean dual-scale DXF export — in the browser, no CAD.
Sewer long section to DXF — step by step
From field coordinates to a CAD-ready longitudinal profile of a gravity sewer. A concrete walkthrough: import, gradients, manholes, drop connections, dual-scale DXF export.

How to draw a pipe long section (plan & profile) without building it in Civil 3D
Generate a utility long section — plan and profile, or "profile view" in Civil 3D — straight from your data, then finish the sheet in CAD: title block, revisions, annotations. A faster split of the work, not a CAD replacement.
Ready to design without the pain?
Altivo is the fastest way to produce a clean DXF. Try it today.
Open the free app